
개발자의 서재
Chaptor.07 - REST API 문서화 (Swagger 2.9.2) 본문
Chaptor.07 - REST API 문서화 (Swagger 2.9.2)
ironmask431 2022. 4. 16. 18:23
REST API 를 SWAGGER 를 이용해 문서화 해보기
1. 스웨거 라이브러리 추가
maven repository 에서 swagger 로 검색해보았다.
검색 결과가 여러개 나와서 이것처것 찾아보다가 아래 2개가 적합한 것으로 확인되었다.
springfox swagger ui => swagger 를 브라우저ui로 볼수있는 기능
springfox swagger2 => swagger 기능
2. build.gradle 에 의존성추가
implementation 'io.springfox:springfox-swagger-ui:2.9.2'
implementation 'io.springfox:springfox-swagger2:2.9.2'
3. config 패키지에 SwaggerConfig.java 생성
package com.leesh.springbootjwttutorial.config;

import com.google.common.collect.Lists;
import org.springframework.context.annotation.Bean;
import org.springframework.context.annotation.Configuration;
import springfox.documentation.builders.ApiInfoBuilder;
import springfox.documentation.builders.PathSelectors;
import springfox.documentation.builders.RequestHandlerSelectors;
import springfox.documentation.service.ApiInfo;
import springfox.documentation.service.ApiKey;
import springfox.documentation.service.AuthorizationScope;
import springfox.documentation.service.SecurityReference;
import springfox.documentation.spi.DocumentationType;
import springfox.documentation.spring.web.plugins.Docket;
import springfox.documentation.swagger2.annotations.EnableSwagger2;

import java.util.Arrays;
import java.util.List;

/**
 * Swagger 설정파일
 */
@EnableSwagger2
@Configuration
public class SwaggerConfig {

    // Swagger url = http://localhost:8080/swagger-ui.html

    @Bean
    public Docket api() {
        return new Docket(DocumentationType.SWAGGER_2)
                .securityContexts(Arrays.asList(securityContext()))//spring security 권한 관련
                .securitySchemes(Arrays.asList(apiKey())) //spring security 권한 관련
                .select()
                //swagger 대상 패키지 설정
//                .apis(RequestHandlerSelectors.any())
                .apis(RequestHandlerSelectors.basePackage("com.leesh.springbootjwttutorial.controller"))
                .paths(PathSelectors.any())
                .build()
                .apiInfo(apiInfo());
    }

    private ApiInfo apiInfo() {
        return new ApiInfoBuilder()
                .title("JWT인증,주문API")
                .description("JWT인증,주문API 입니다.")
                .version("1.0.0")
                .termsOfServiceUrl("")
                .license("LICENSE")
                .licenseUrl("")
                .build();
    }

    private ApiKey apiKey() {
        //2번째 인자값인 keyname 은 로그인 시 header에 토큰이 저장되는 keyname 으로 설정해줘야 한다.
        return new ApiKey("JWT", "Authorization", "header");
    }

    private springfox.documentation.spi.service.contexts.SecurityContext securityContext() {
        return springfox.documentation.spi.service.contexts.SecurityContext
                .builder() .securityReferences(defaultAuth())
                .forPaths(PathSelectors.any())
                .build();
    }

    List<SecurityReference> defaultAuth() {
        AuthorizationScope authorizationScope = new AuthorizationScope("global", "accessEverything");
        AuthorizationScope[] authorizationScopes = new AuthorizationScope[1];
        authorizationScopes[0] = authorizationScope;
        return Lists.newArrayList(new SecurityReference("JWT", authorizationScopes));
    }
}
기본적으로 swagger로 api문서를 만들기 위해서는
api(), apiInfo() 두 메소드만 정의해주면 된다. 스프링 시큐리티 로그인이나, JWT 토큰이 필요한
API의 경우에는 apiKey(), securityContext(), defaultAuth() 메소드도 만들어 주어야 한다.
==> 서버구동
Caused by: java.lang.NullPointerException: null ... 관련 에러 발생
확인해보니 아래와 같은 내용이 있었고, application.yaml 에 코드를 추가하여 해결하였다.
https://www.inflearn.com/questions/230160
저도 다른버전으로 해보다가 동일한 오류가 발생해서 해결방법 공유합니다.
springboot : 2.6.2
swagger : 3.0.0
Spring boot 2.6버전 이후에 spring.mvc.pathmatch.matching-strategy 값이 ant_apth_matcher에서 path_pattern_parser로 변경되면서 몇몇 라이브러리(swagger포함)에 오류가 발생한다고 하네요.
application.yml 에 아래 설정을 추가하면 오류가 발생 안합니다.
spring:
mvc:
pathmatch:
matching-strategy: ant_path_matcher
4. swagger ui에 접속하기 위해서 (http://localhost:8080/swagger-ui.html)
해당 url은 시큐리티 설정에서 허용처리 해줘야 한다.
SecurityConfig.java 설정 수정
@Override
public void configure(WebSecurity web) throws Exception {
   web.ignoring()
           .antMatchers(
                   "/h2-console/**", //h2 console
                   "/favicon.ico",
                   "/v2/api-docs",              //swagger-ui 관련
                   "/swagger-resources/**",
                   "/swagger-ui.html",
                   "/webjars/**",
                   "/swagger/**"
           );
}
5. Swagger 브라우저에서 확인
http://localhost:8080/swagger-ui.html
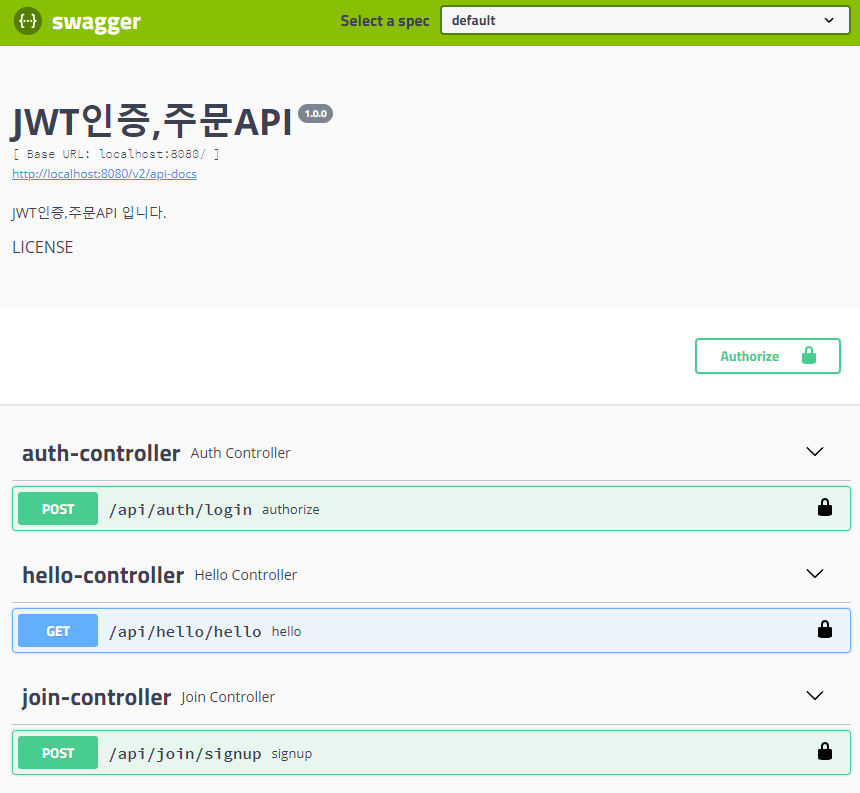
6. swagger에서 api 테스트 실행
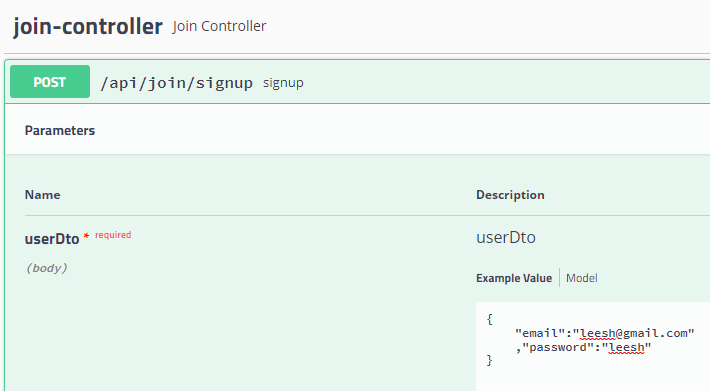
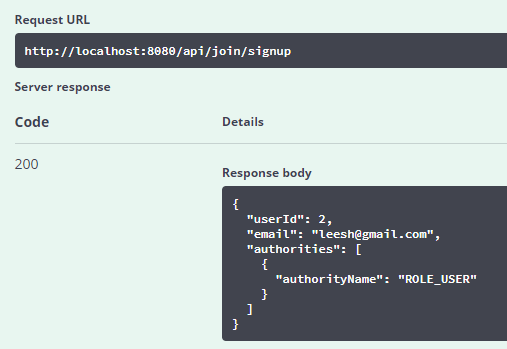
1) 회원가입 api 테스트
2) 로그인(토큰발급) api 테스트


토큰 정상 발급 확인
3) 주문하기 테스트

==> 401 에러가 발생한다. 주문하기 api는 JWT토큰이 있어야만 접근이 가능하므로,
Swagger 에서 테스트시 토큰 설정을 해주어야 한다.
토큰 설정 방법
1) 로그인 api 실행 후 리턴메세지에서 token 값 복사

2) Authorize 버튼 클릭 (SwaggerConfig.java 파일에 jwt 관련 코드가 추가되어 있어야 버튼이 생성됨.)
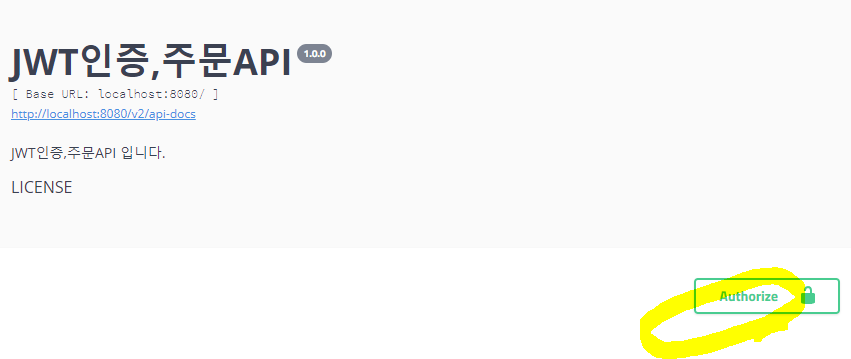
3) value 에 Bearer + 공백2 + 복사한 token 입력 (JwtFilter.java 에서 해당 형태로 header에 입력하도록 되어 있음.)

4) 토큰 추가 후 token 이 필요한 api 가 정상 응답되는 것을 확인 할 수 있다.

'SpringBootProject > SringBoot_JWT_RestApi' 카테고리의 다른 글
| Chaptor.09 - 로컬에 docker설치, Spring boot 프로젝트 도커이미지 만들기, 도커이미지 로컬에서 실행해보기 (0) | 2022.04.18 |
|---|---|
| Chaptor.08 - 단위 테스트 코드 작성(Controller별 테스트) (0) | 2022.04.18 |
| Chaptor.06 - 상품,주문 entity, repository, dto, servcie, controller (API) 추가 (0) | 2022.04.03 |
| Chaptor.05 - 회원가입 API 생성 , 권한검증 테스트 (0) | 2022.04.03 |
| Chaptor.04 - DTO, Repository, 로그인API 생성 (0) | 2022.04.03 |


